
This will be a guide on how to get a basic GoPhish Server setup and running on an Amazon AWS EC2 instance. Since I’m just doing a short tutorial, I’m not going to be registering a Domain for this exercise. The first thing we will need to do is setup an EC2 Instance. Then we will install and setup GoPhish.
Part 1: Setting up Our EC2 instance
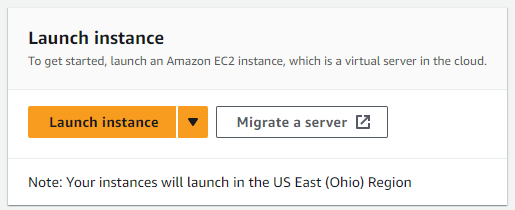
- We need to launch an instance from the dashboard, select “Launch Instance”
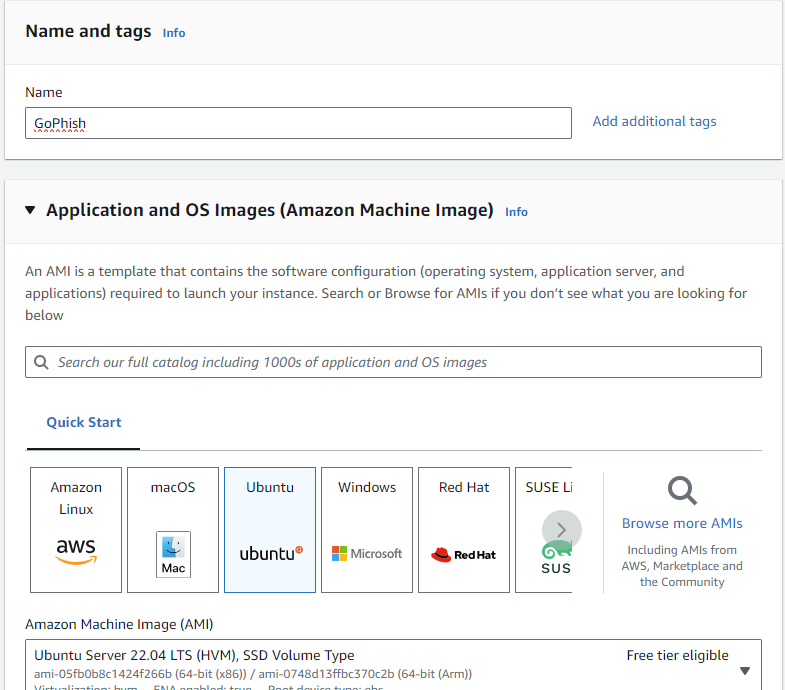
2. Name your instance and select Ubuntu Server.
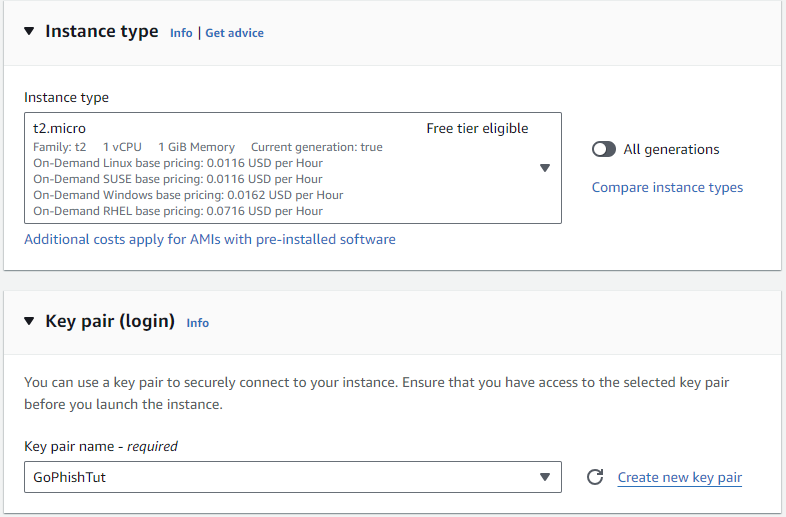
3. Select T.2 Micro and either generate a new key pair or use an existing one. Once the key has downloaded, Launch the instance.
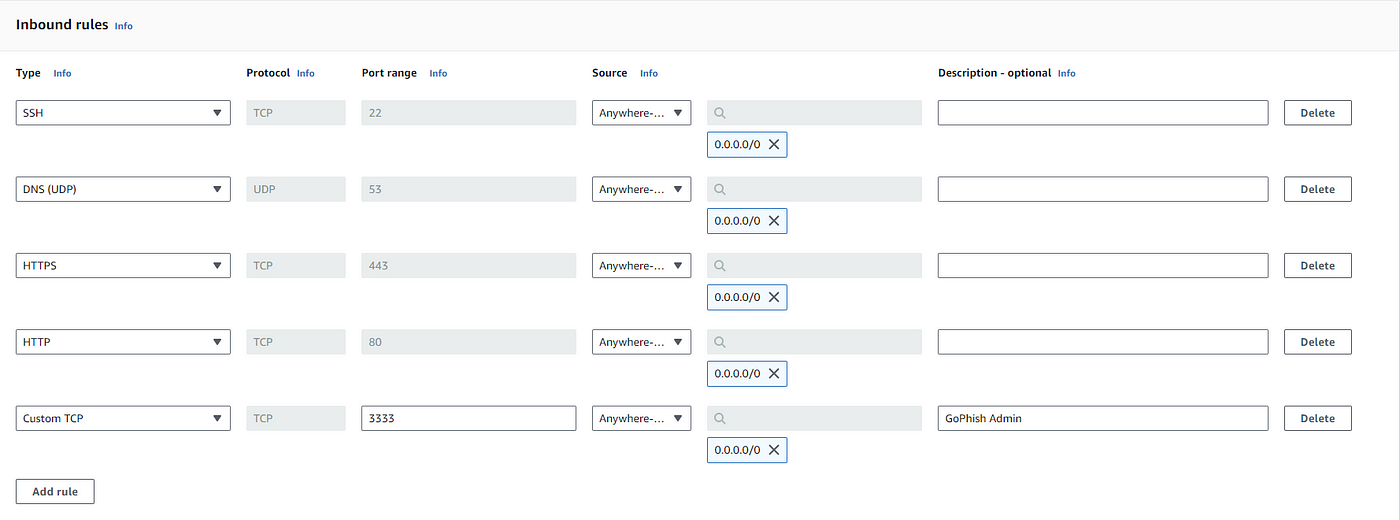
4. Create a new security group with the following rules.
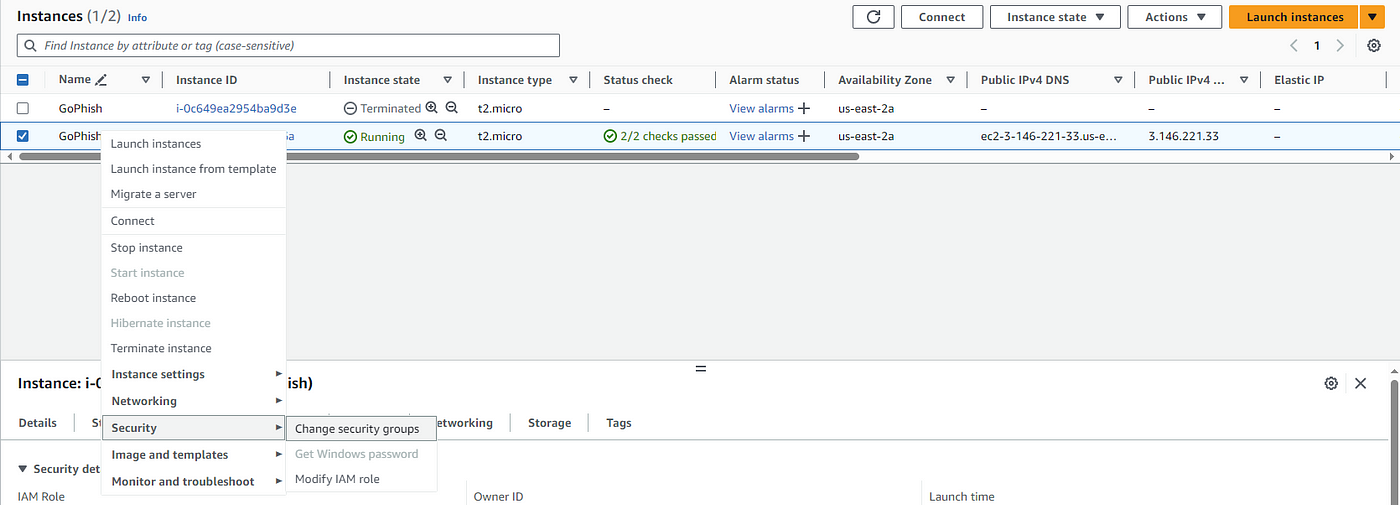
5. Go to your instances, right click on your GoPhish instance and select Change Security Groups. Make sure to remove the default security group.
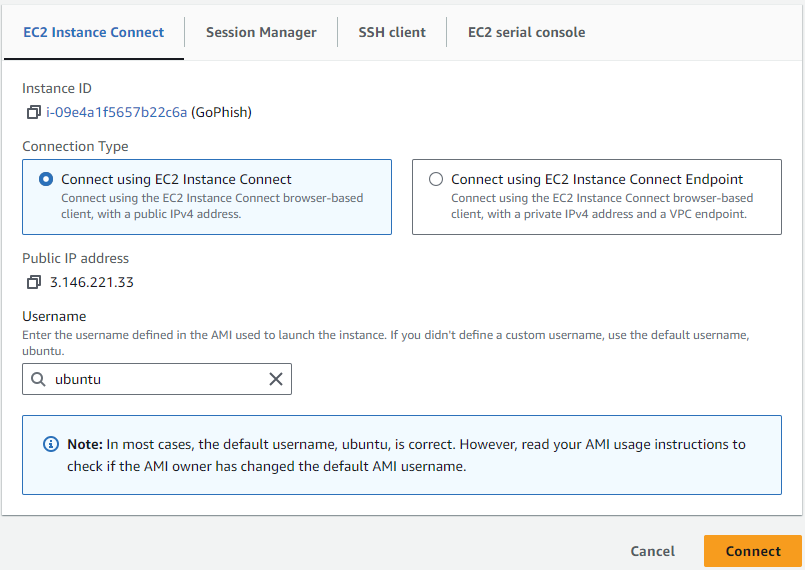
6. Now we will connect to our EC2 instance using EC2 Instance Connect.
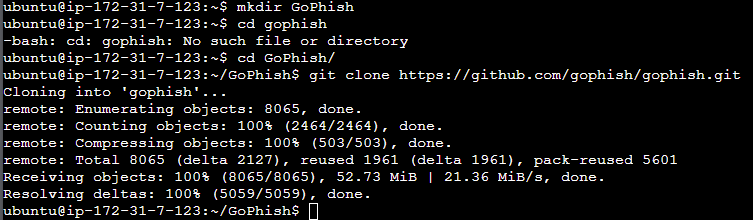
7. Once connected i ran sudo apt updateand sudo apt upgrade -yto ensure everything was current. Since git is already included, we will use it to get GoPhish. I created a directory to store everything in to help keep my instance organized mkdir GoPhish. Then I moved into the new directory before running git clone https://github.com/gophish/gophish.git
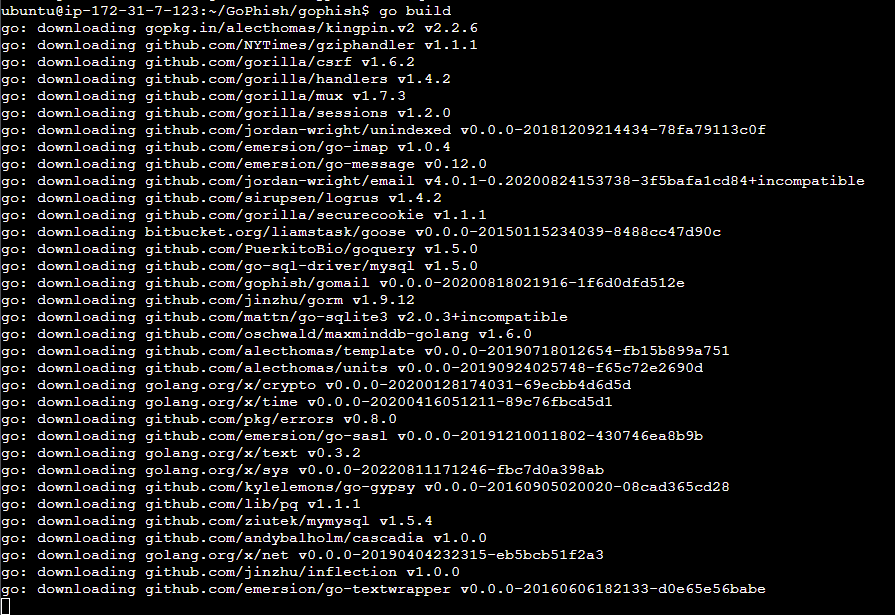
8. Once complete go to the source directory and execute go build. You may have to install golang-go in order to do this. sudo apt install golang-go -y. I had to do that in order to proceed with the go build command. Once complete you should have a binary named gophish in the current directory.
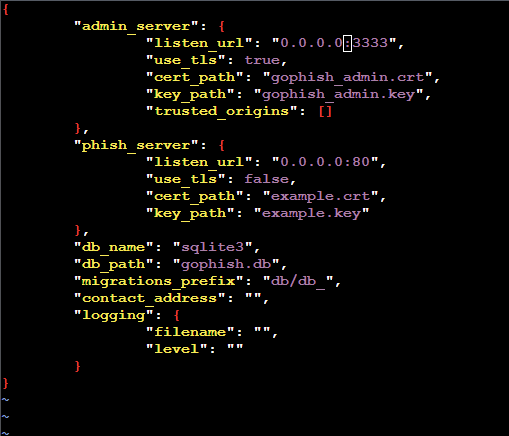
9. Now we need to make a change to the config file. I used VI, so the command run was sudo vi config.json. You’ll change the admin server listen URL from 127.0.0.1:3333 to 0.0.0.0:3333 so that we can access the admin page from any IP address. Once complete make sure to save changes.
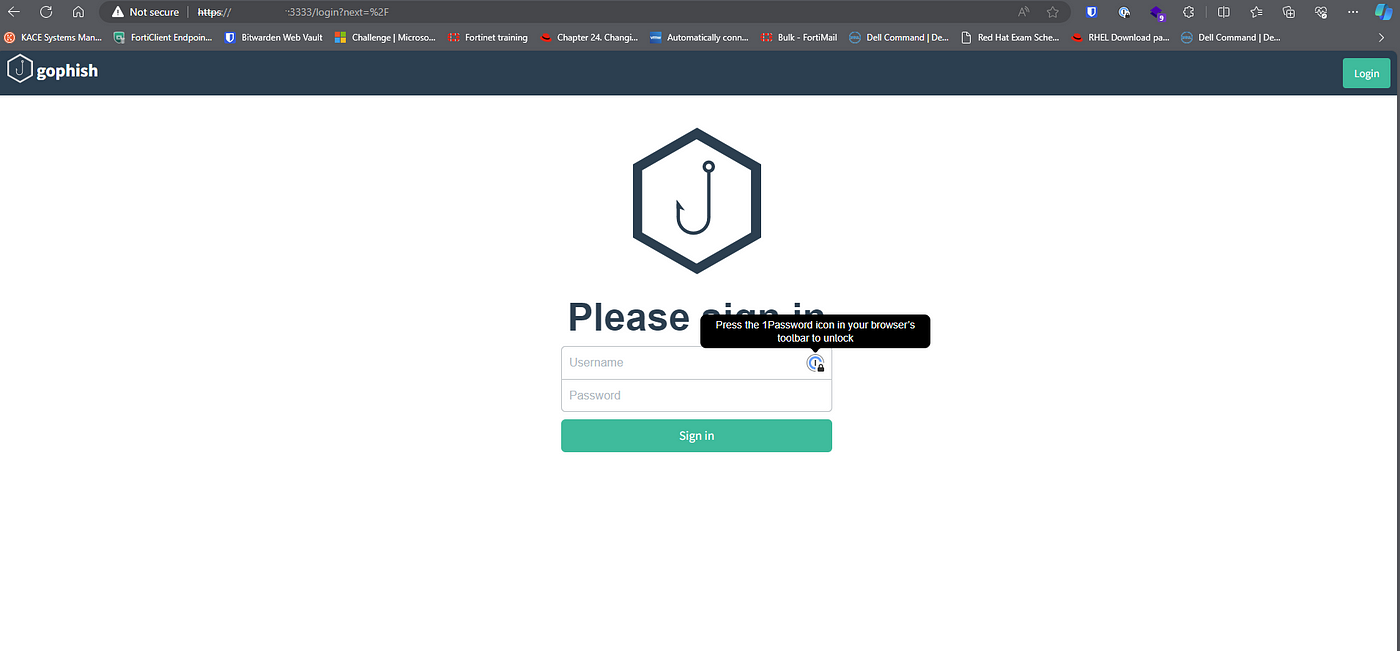
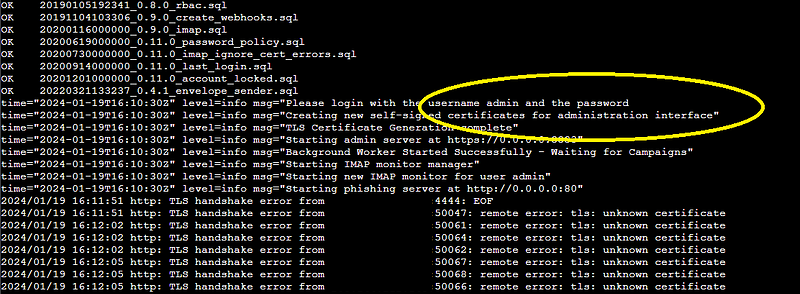
10. With all of that done we are ready to execute our GoPhish binary using sudo ./gophish Once running, use the public ip address of your EC2 instance and port 3333 (ex. https://ipaddress:3333). Make sure to include the https://. You can find the password in the terminal. You’ll reset the password when you login the first time.
At this point your server is up and running. Now you will just need to configure it to be able to send emails. I’ll create another post on configuring GoPhish settings in the admin portal.

Leave a comment