
This writeup covers the tasks found in the Passive Recon room at Tryhackme.com
Task 1: Introduction
In the passive recon room, we defined what passive and active recon is and focused on tools used for passive reconnaissance. We started with command line tools whois, nslookup, and dig. Then we explored DNSDumpster and Shodan.io.
Task 2: Passive vs. Active Recon
In this room, we defined reconnaissance as a preliminary survey to gather information about a target. In the Unified Kill Chain, this is the first step to gain an initial foothold. Passive reconnaissance is reconnaissance is gathering information from publicly available sources that don’t require you to engage the target. Passive recon can be things such as looking up DNS records, job listings, or news articles. Active recon involves direct engagement with the target. This could be hitting the target’s servers, social engineering, or physically accessing the target’s physical locations. Due to the nature of active recon, it is easy to get into legal trouble without proper authorization.
Task 3: WHOIS
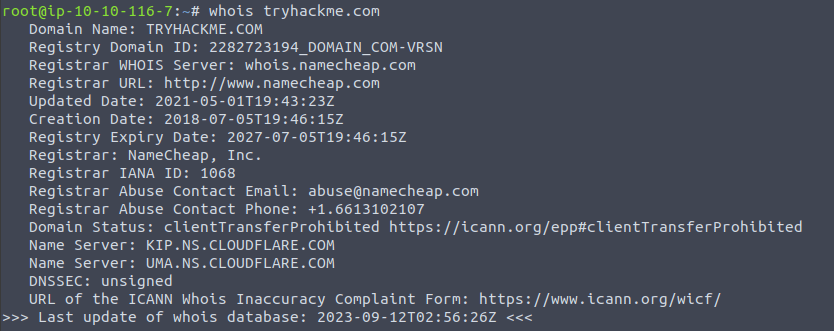
This task taught us about the command line tool whois. WHOIS is a request and response protocol and listens on TCP port 43 for incoming requests. The WHOIS server responds with information of the requested domain. This response gives us a variety of information such as contact information of the registrant, when it was created, expires, and when it was updated, and the name server. One thing you may notice is that now registrants are able to redact some information for privacy. You can use this information to find new attack surfaces assuming they fall within scope of your penetration test.
Task 4: nslookup & dig
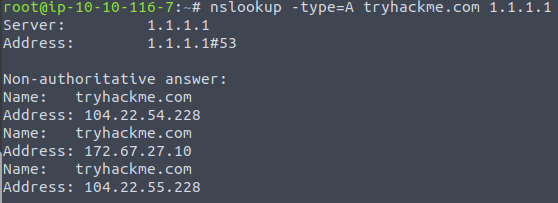
In this task we learned about two more command line tools: nslookup and dig. Nslookup stand for Name Server Look Up. When using nslookup there are three main parameters: Options, Domain_name, and Server. Options will let you set the type of query you want to make, you can make the following queries: A, AAAA, CNAME, MX, SOA, and TXT. Domain_name is the name of the domain you are looking up. And Server is the DNS server that you want to query. You can use a local DNS or public DNS such as Cloudflare at 1.1.1.1 or 1.0.0.1, Google at 8.8.8.8 or 8.8.4.4. There are many more public DNS servers to choose from as well.
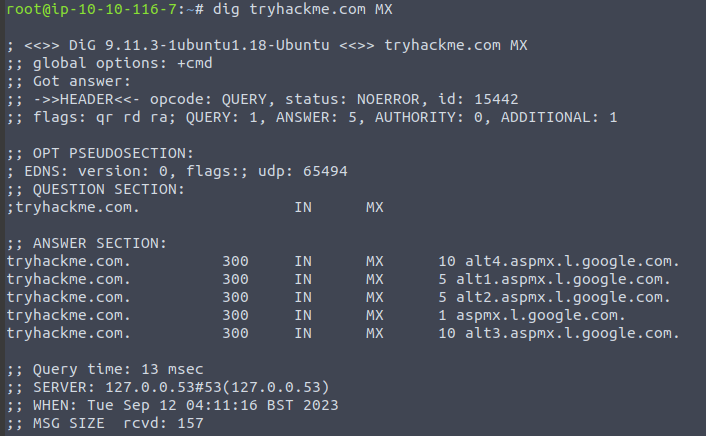
Dig stands for “Domain Information Groper” and can make advanced DNS queries and additional functionality over nslookup. For a dig query you would setup your query like this: dig @1.1.1.1 tryhackme.com MX. As you can see, it shows much more information than nslookup does.
Task 5: DNSDumpster
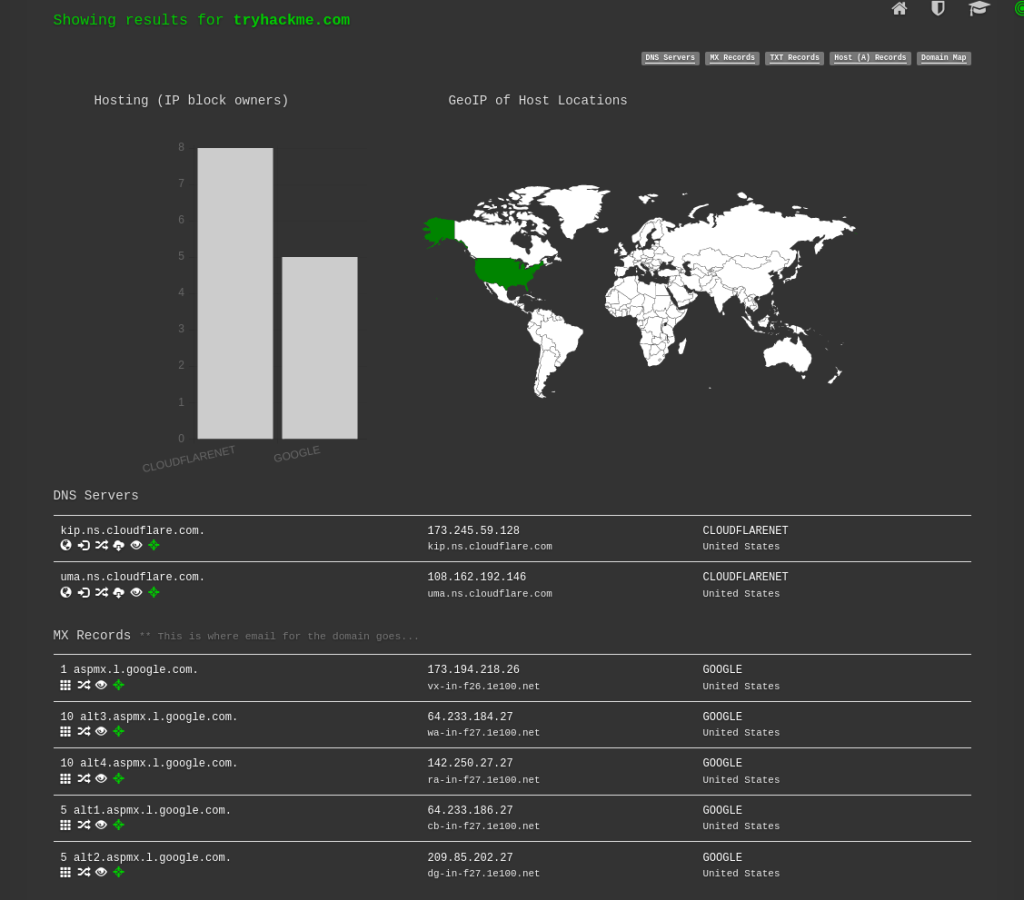
DNSDumpster is a handy web tool that will help you find subdomains. It will also show you some of the same information that you found with nslookup and dig. It will provide a list of the various servers associated with the domain as well as their respective IP addresses.

One of the things that I like about DNSdumpster is that it creates a tree that shows the data in a nice graphic and shows the DNS and MX branching off to their servers and the IP addresses.
Task 6: Shodan.io
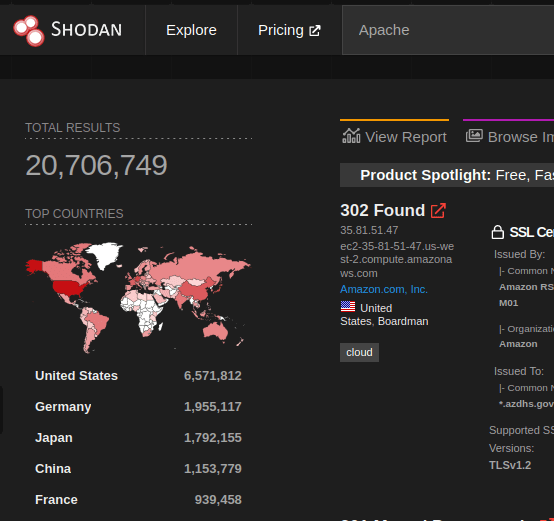
Shodan.io is a powerful web site that attempts to connect to every reachable device on the internet. When it connects to a device it collects all the information of the service and puts it in a searchable database. A while back, there was an attack on printers all over the world that were exposed to the internet. The attacker used Shodan.io to find these printers and created a 3 line script to send a print job to each printer. I’ll also note that I have seen traffic from Shodan.io hitting the firewall of the company I work for.

Leave a comment