
When working as part of a red team, you might only be given the company name. Therefore, it is important to know how to gather information about your target. Ideally, you are conducting this recon in a way that they won’t be able to detect. This room covers some of the tools that we can use as part of a red team engagement to conduct recon on the target without being detected. We will cover types of recon, WHOIS and DNS-based recon, advanced searching, image searching, Google hacking/dorking, specialized search engines, recon-ng, and maltego.
Task 2: Taxonomy of Reconnaissance
As you may already know, recon can be broken into two broad categories: active and passive. Passive recon is recon that can be carried out by watching passively. In our case, passive recon is recon that can be done without interacting with the target. It relies purely on publicly available information that is collected and maintained by a third party. This is also often referred to as Open Source INTelligence (OSINT). Active recon, is when you start interacting with the target. This could be in the form of sending requests and packets to the target. It can even extend into the physical domain if you were to try to gain physical access to buildings of the target company. This also brings up the two different types of active recon: External and Internal. External recon is recon that you conduct from outside the target’s network and it primarily focuses on the externally facing assets that can be accessed from the internet. Internal recon is conducted from within the network. This means that you may be physically in the company building or you have been given access to a device on the network.
Task 3: Built-in Tools
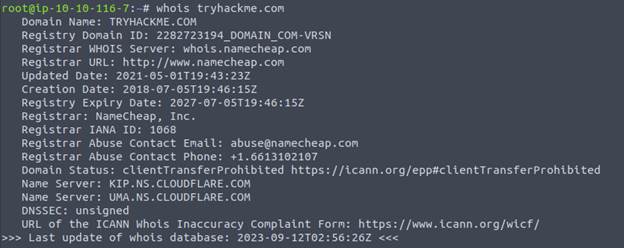
This task taught us about the command line tool whois, dig, nslookup, host, and traceroute. WHOIS is a request and response protocol and listens on TCP port 43 for incoming requests. The WHOIS server responds with information of the requested domain. This response gives us a variety of information such as contact information of the registrant, when it was created, expires, and when it was updated, and the name server. One thing you may notice is that now registrants are able to redact some information for privacy. You can use this information to find new attack surfaces assuming they fall within scope of your penetration test.
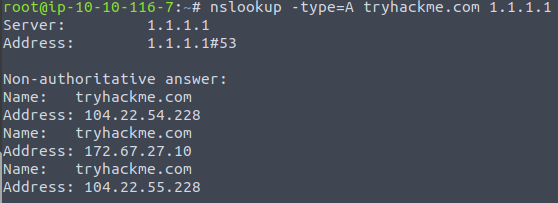
We then discussed two more command line tools: nslookup and dig. Nslookup stand for Name Server Look Up. When using nslookup there are three main parameters: Options, Domain_name, and Server. Options will let you set the type of query you want to make, you can make the following queries: A, AAAA, CNAME, MX, SOA, and TXT. Domain_name is the name of the domain you are looking up. And Server is the DNS server that you want to query. You can use a local DNS or public DNS such as Cloudflare at 1.1.1.1 or 1.0.0.1, Google at 8.8.8.8 or 8.8.4.4. There are many more public DNS servers to choose from as well.
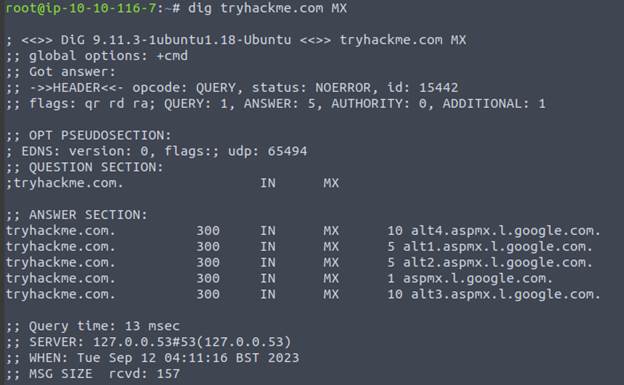
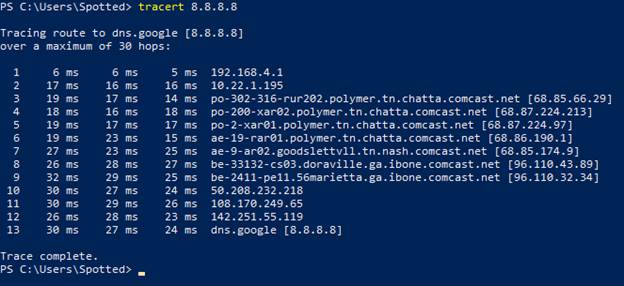
Dig stands for “Domain Information Groper” and can make advanced DNS queries and additional functionality over nslookup. For a dig query you would setup your query like this: dig @1.1.1.1 tryhackme.com MX. As you can see, it shows much more information than nslookup does. One other way top query DNS records is with host. Finally, traceroute (Linux) or tracert (Win) can be used to see the route packets take to get from our system to the target
Task 4: Advanced Searching
This lab was all about how to use search operators to and modifiers to better filter our search results. Here’s a table of popular modifiers that work across many search engines.
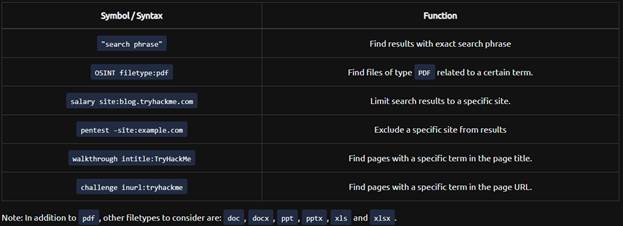
Every search engine will have its own set of rules and syntax. In order to learn them, you can visit their help pages. Search engines can be useful in finding confidential information. Examples of this information include: internal documents, confidential spreadsheets, files with usernames, sensitive directories, Service version number, or error messages. In addition to search engines, we can also use social media and job boards. All too frequently, people are eager to share what they are working on at work and this can provide insight into what technologies are being used in the company. The same thing happens on job postings. By looking at the job postings for a company, you can often decipher what software or technology the company is using. This will help you form some ideas and help you focus your efforts.
Task 5: Specialized Search Engines
The first of the specialized search engines we covered is viewdns.info. This site offers reverse DNS lookup. Today, it is not uncommon to run into shared hosting. This means that one IP address maybe shared with many different domain names. When we run a reverse lookup, we can find all the domains that are associated with an IP address. This is important to make sure you are hitting only the intended target.

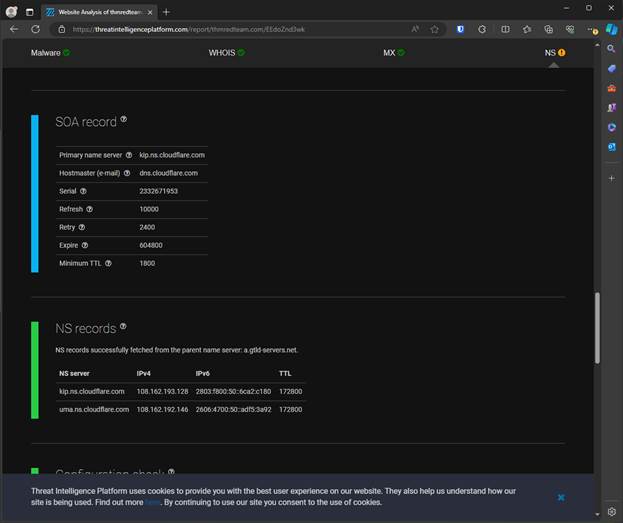
Then next specialized search engine we talked about was the threat intelligence platform. This site will launch a series of test against a provided domain name or IP address. The results are similar to WHOIS and dig, but more appealing. It will also give us extra information such as other domains on the same IP address, fully resolved records to a NS.
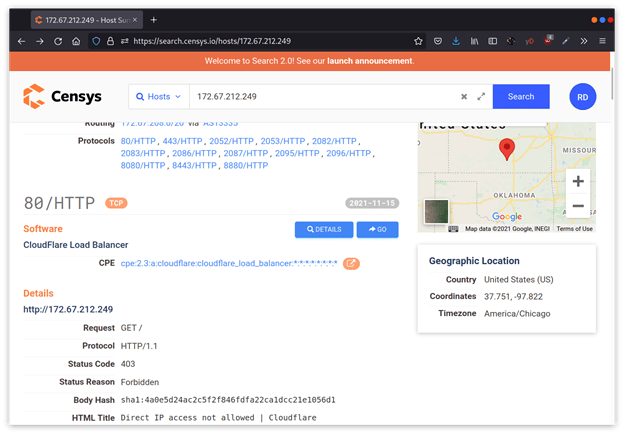
Next up is Censys. This site lets us look get more information on IP addresses and domains. In the example from the room, you can tell that Cloudflare owns the IP address and not the client. This is a critical piece of information to make sure we stay within the scope of our contract.
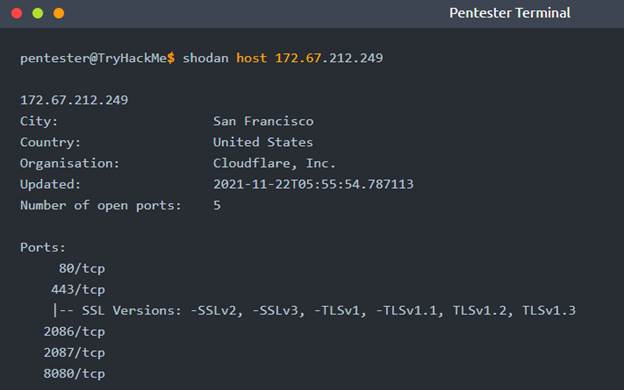
Finally we looked at Shodan.io and how to use it from the command line. In order to use it you must first have a shodan account. Then you find your API key and use it with the shodan init command. Once you have your key in, you can start looking up info from shodan. In the room we looked up information about one of the IP addresses we got from nslookup.
Task 6: Recon-ng
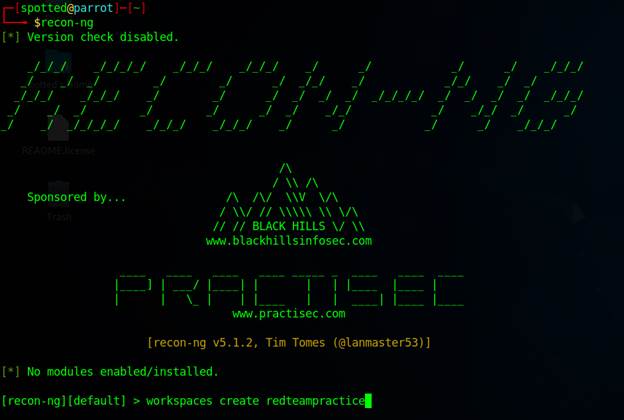
Recon-ng is a tool that helps automate OSINT work. All the data you collect is automatically saved to a database related to your workspace. In this task, we created a workspace, inserted starting information, search for and installed a module, and ran the loaded module.
In order to create a workspace you would run the following command
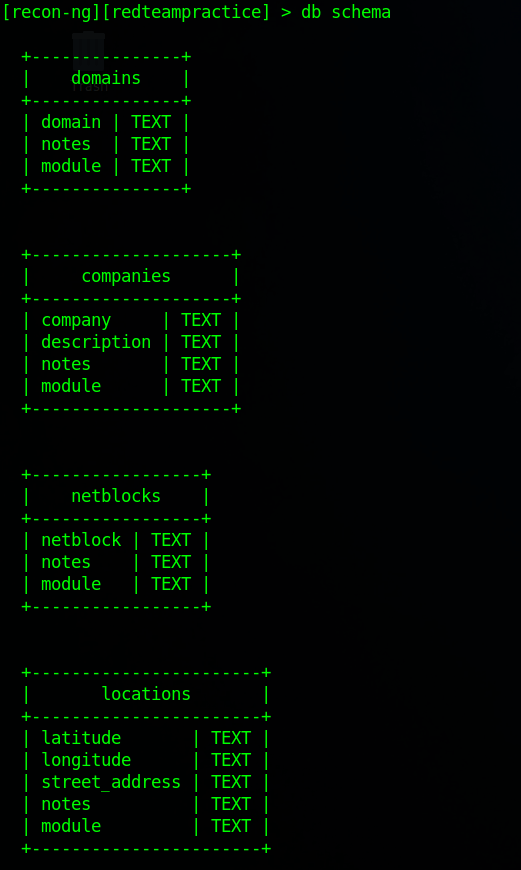
Next up we need to start adding information to the database, but first you need to be familiar with the database schema. In order to see that you can run the command db schema
Then to insert the domain we would run the command db insert domains.
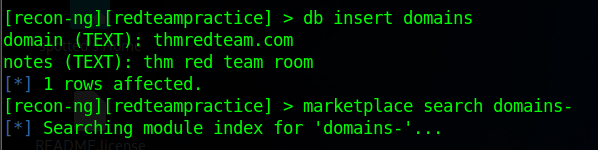
The next task was to find a module. When you are searching the market place, there are several commands you can use:
- Marketplace search KEYWORD search for available modules with keyword
- Marketplace info MODULE provides information about the module
- Marketplace install MODULE installs module into Recon-NG
- Marketplace remove MODULE uninstalls module
There are many different categories and subcategories that the modules can be in. In this room we searched for modules with domains- in the name.

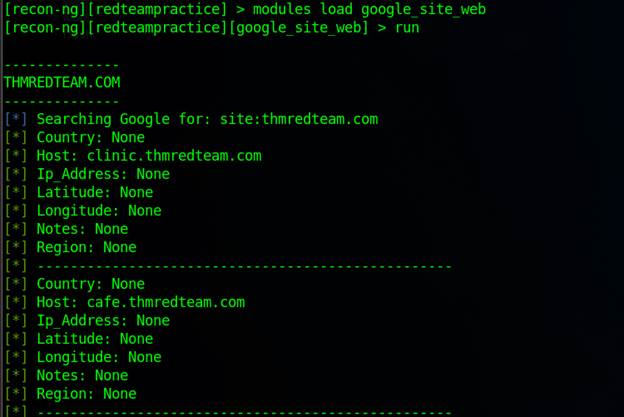
In this instance we ended up installing the google_site_web module. Once you have a module installed, you will want to use it. In order to do that you need to first load the module, then you can run it
Task 7: Maltego
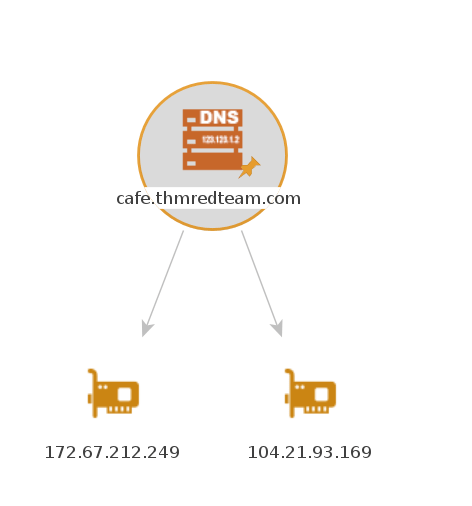
In this final task of the room, we covered Maltego. Maltego is an application that combines mind-mapping and OSINT. You start out with a piece of information and then it goes this various transformations as you work with it. The information you collect here could be useful at later stages of the engagement. For example, it could help you craft very convincing phishes. One key note about the transforms is that some of them will connect to the target system. So you should always make sure you understand how the transform works before using it. In the room, we transformed the domain name to IP addresses
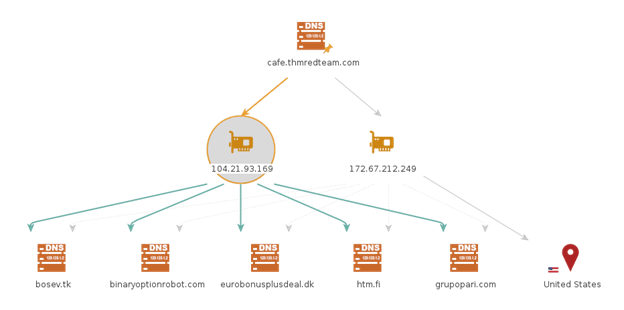
From here we could apply another transform to each IP address.
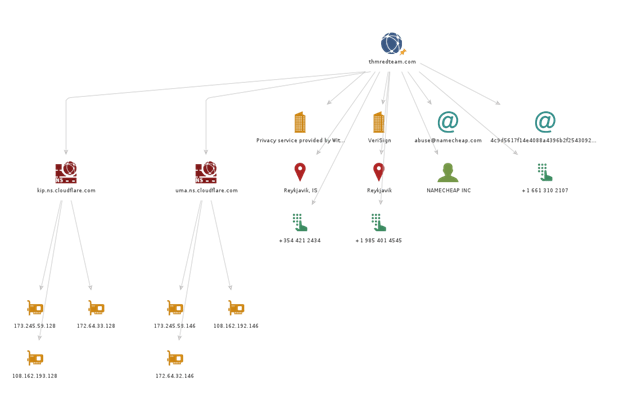
Earlier we pulled info using WHOIS and nslookup, in Maltego, we can pull that same information but in a pretty graphical presentation.
Transforms in Maltego are grouped into categories based on type, pricing, and the target audience. Many of the transforms can be used with the Community edition, but others will only work with the paid version. Activation is required in order to use Maltego, even for the free version.
Summary
In this room we learned about multiple tools that can be used to gather OSINT for a Red Team engagement. We first started by covering what reconnaissance is and the difference between active and passive. Then we covered tools that are built-in to linux: whois, dig, and nslookup. Then we explored how we could flex the muscles of search engines to help us find more information during our recon work. Finally, we looked at two tools, Recon-ng and Maltego, and explored how they allow us to aggregate our information into one place and see the relationship between our pieces of information. The purpose of collecting this information is to help us find weaknesses and vulnerabilities in the target. With the information we gathered, we could launch better, more efficient phishing campaigns and target our efforts on specific vulnerabilities and services. The better we do at this stage, the better our later stages will be; increasing our chances of success.

Leave a comment